



 26
26
👉 This article is linked to the article: Edit or Remove a Category.
Buyer users with the appropriate rights can create category tailored to their procurement needs. These categories help categorize suppliers in the registry based on predefined criteria.
Category act as sections that help organize and manage the supplier registry. They can be set up based on professional category (e.g., construction or IT companies), geographic area (e.g., suppliers in Attica or Northern Greece), or service type (e.g., office supplies or cleaning services). This structure supports more precise classification of supplier requirements and attributes, enabling more targeted supplier management, better monitoring, and more effective evaluation.
Each category can be associated with specific questionnaires, enabling the collection of specialized information and documents from suppliers. Once an application for joining a category is submitted, the supplier must complete the relevant questionnaires, which you are responsible for approving or rejecting in order to finalize the process.
📺 See the related video/GIF for step-by-step guidance on how to create a category.
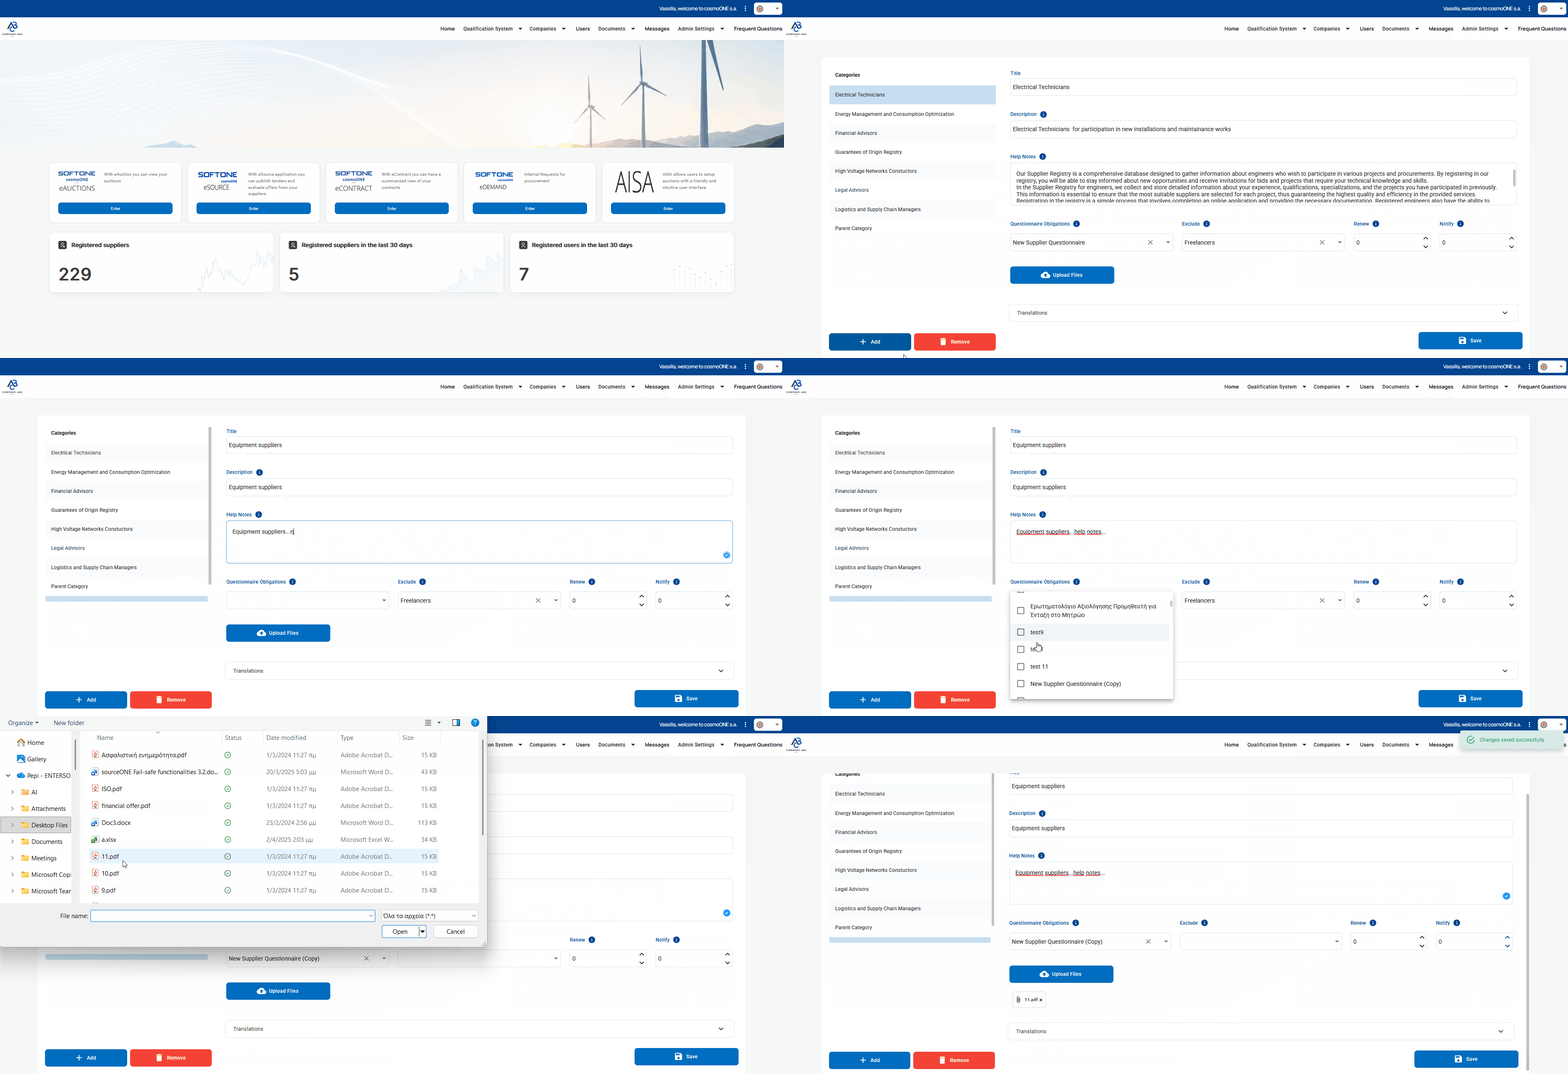
➤ Step by step instructions:
1. Go to the Admin Settings → Categories menu .
2. Press the +Add button (at the bottom left).
3. Fill in the “Title” field, using a descriptive title for the category.
4. Fill the “Description” field, with a brief description for the category.
5. Fill in the “Help Notes” field with the requirements the supplier must meet, participation criteria such as: required documents, guidance for completing questionnaires, and any other relevant information. This text will be displayed to the supplier during their application and will guide them in joining the specific category.
6. If required, use the “Questionnaire Obligations” dropdown list to specify which questionnaires suppliers must complete to join the category, by selecting the corresponding checkboxes on the left.
7. Use the “Exclude” field, to select company types that are excluded from completing the questionnaires associated with the category, if required. Suppliers select their Entity type during sign-up.
More details can be found in the article:
👉 Creating Entity Types and linking them to Questionnaires
8. Use “Renew” field (arrows) to optionally specify the number of months after which the supplier must renew their submission in the category.
9. Use the “Notify” field to optionally set how many days before the submission expires the supplier will receive a notification.
10. Optionally, you can add reference files related to the category (such as templates, legal texts, policies, or newsletters) that will be displayed to the supplier while submitting their application. To upload a file, click Upload Files and choose the file from your computer. To remove a file, click the “x” next to its name.
⚠️ The maximum allowed size for each file is 20 MB, while the total size of all files must not exceed 100 MB.
11. Click the arrow on “Translations” to optionally enter translations for the fields (Title, Short Description, and Instructions).
12. Click Save to complete the creation of a Category.
If you wish to modify or remove an existing category, see more details in the article:
👉 Edit or Remove a Category Group

