28
28
👉 This article is linked to the article: What can I do through the option “Registered Suppliers”?
There are two scenarios in which the need to evaluate a questionnaire may arise, as supported by the system:
- The selection of the Legal Entity Type during the supplier's registration on the portal.
- The supplier's request to join category groups.
1. Searching for questionnaires associated with a company type
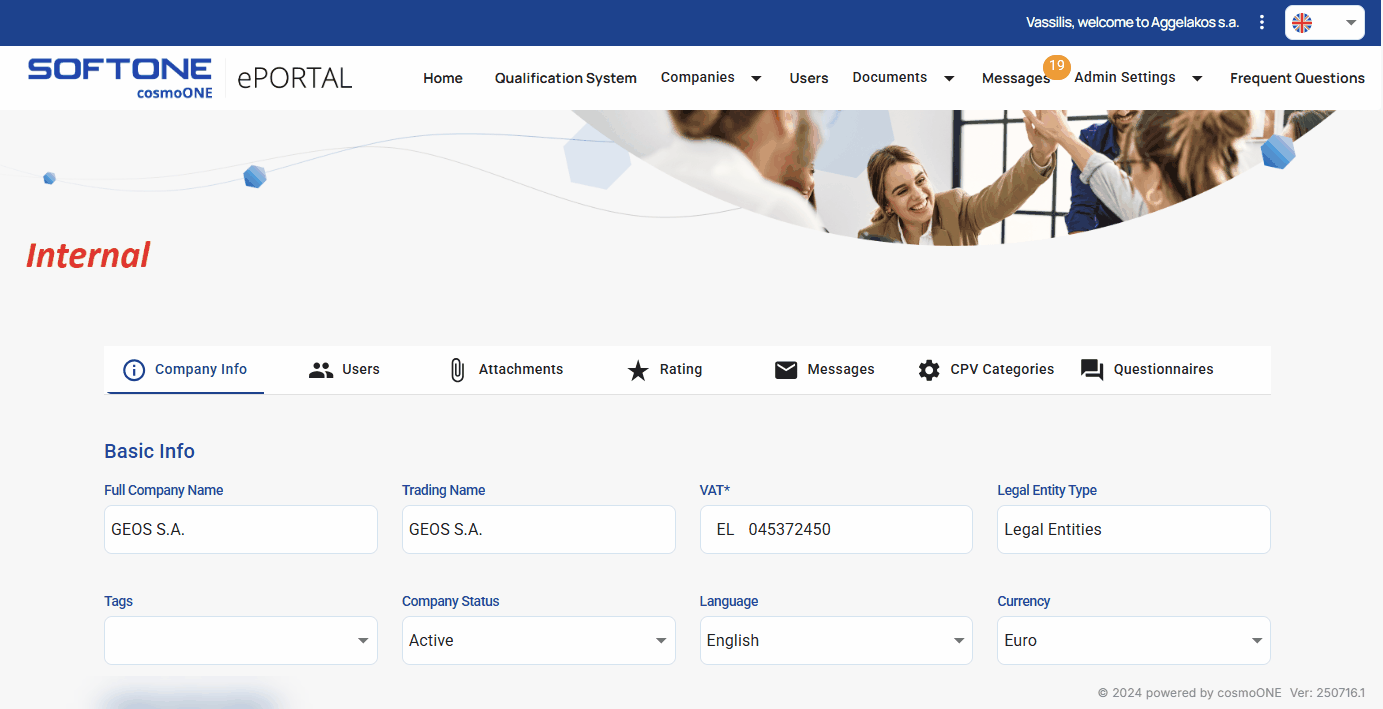
To view the questionnaires associated with the Legal Entity Type selected during the supplier's registration, go to the company details and click the
“Questionnaires” tab.
📺 See the related video/GIF for step-by-step guidance on how to search for questionnaires related to the Legal Entity type.
➤ Step by step instructions:
1. From the main menu, select Companies → Registered Suppliers to display the list of suppliers.
2. Search for a supplier using “Brand name” or “VAT”. You can also apply additional filters using the Show more filters button, or locate the supplier directly from the displayed list.
3. In the last column “Actions” please click on the pencil icon to view the company’s tabs.
4. Click on “Questionnaires” tab.
5. Please follow the instructions given on 3. “How to Evaluate Questionnaires” below.
2. Search for questionnaires linked to Category Groups
To review questionnaires originating from a request to join category groups, the “Qualification System” section displays a table summarizing the status of the questionnaires by category group.
The columns of the table display the following information:
- Total count: The total number of questionnaires that have been submitted.
- Approved: The number of questionnaires that have completed the approval process (displayed with a green indicator).
- Pending: The number of questionnaires that are still under review (displayed with a red indicator).
- Actions: The actions menu (three vertical dots), from which the user can select additional functions.
📺 See the related video/GIF for step-by-step guidance on how to search for questionnaires linked to category groups.
➤ Step by step instructions:
1. From the main menu please select “Qualification System”.
2. On the “Category Groups” section, locate a category that contains questionnaires pending approval.
3. On the “Actions” column, click on the three vertical dots (⋮).
4. From the pop-up option select “View”.
5. Find the desired company and from the “Actions” column, click on the three vertical dots (⋮).
6. On the pop-up menu please select “View”.
7. Click on the “Questionnaires” tab.
8. Follow the instructions in: “3. How to Evaluate Questionnaires” further below.
📌Note: You can also access the same “Questionnaires” tab through the “Companies” section.
For further details please see the article:
👉 What can I do through the option “Registered Suppliers”?
3. How to Evaluate Questionnaires
Questionnaires can have one of the following statuses:
- Completed: The questionnaire has been submitted by the company but has not yet been evaluated.
- Approved: The questionnaire has been approved.
- Rejected: The questionnaire has been rejected.
Depending on how a questionnaire is created, there are three distinct cases for its management:
- Ability to approve or reject in full.
- Ability to partially approve or reject.
- Ability to automatically approve a questionnaire.
For detailed instructions on how to create a questionnaire, see the article:
👉 Creation of a Questionnaire with Manual Question Entry
Here are three illustrative examples of managing the cases described above.
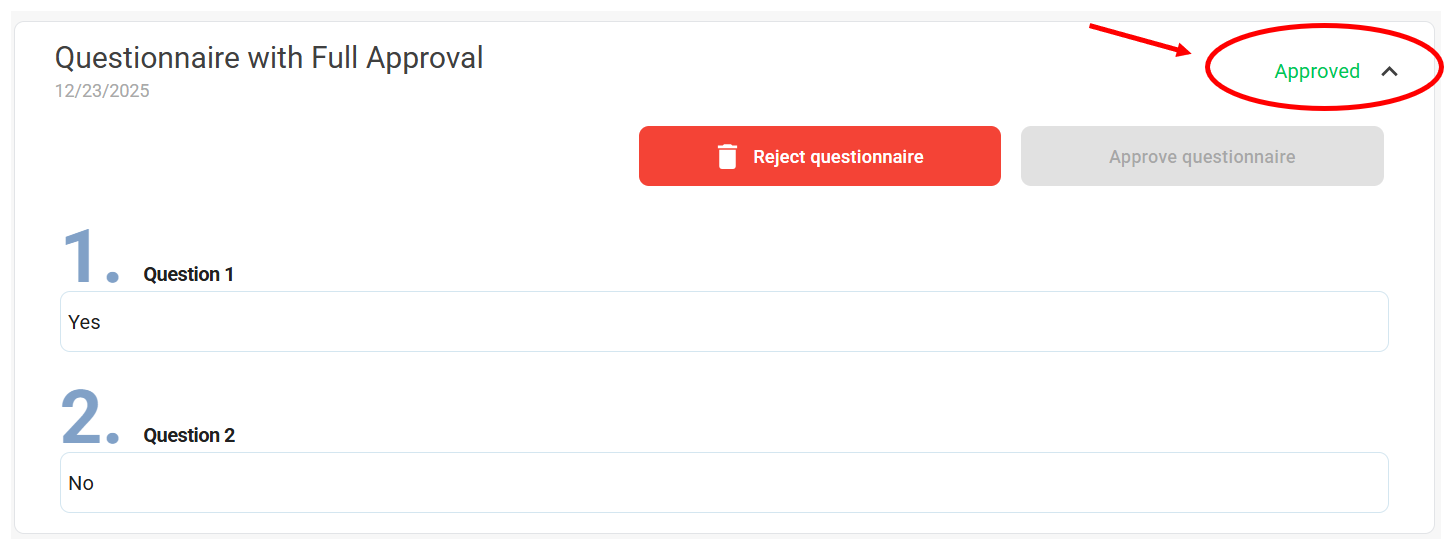
3.1 Approve or reject in full
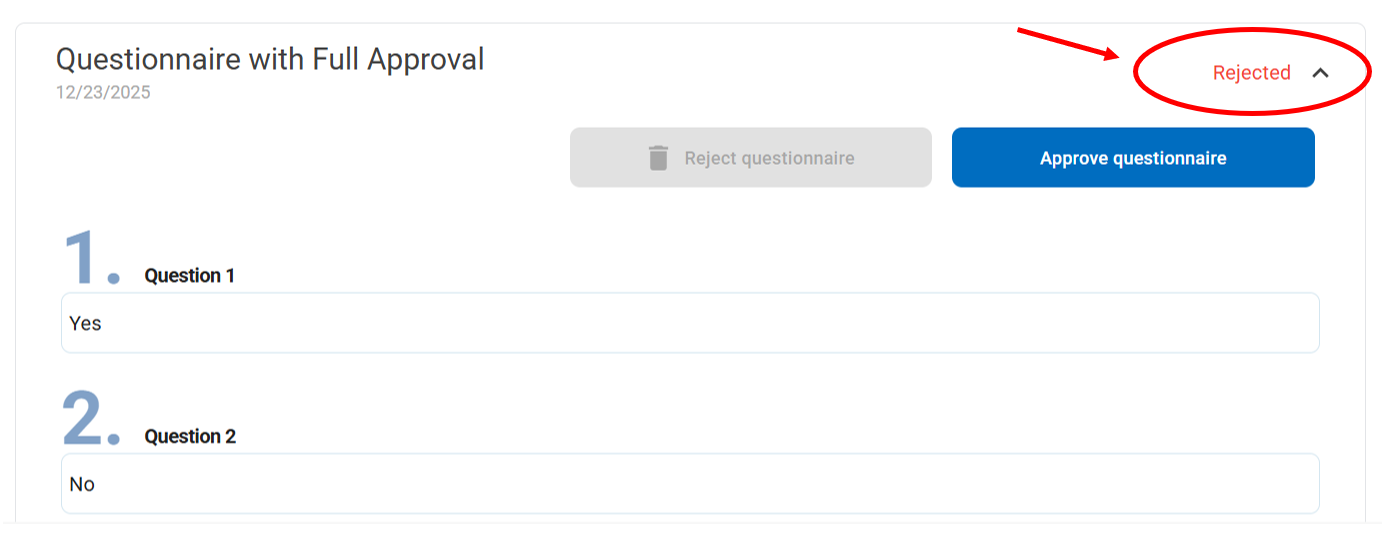
When a questionnaire is configured for full approval or rejection, review it and then click the appropriate, Approve questionnaire or Reject questionnaire button located at the top right of the questionnaire, as shown below.
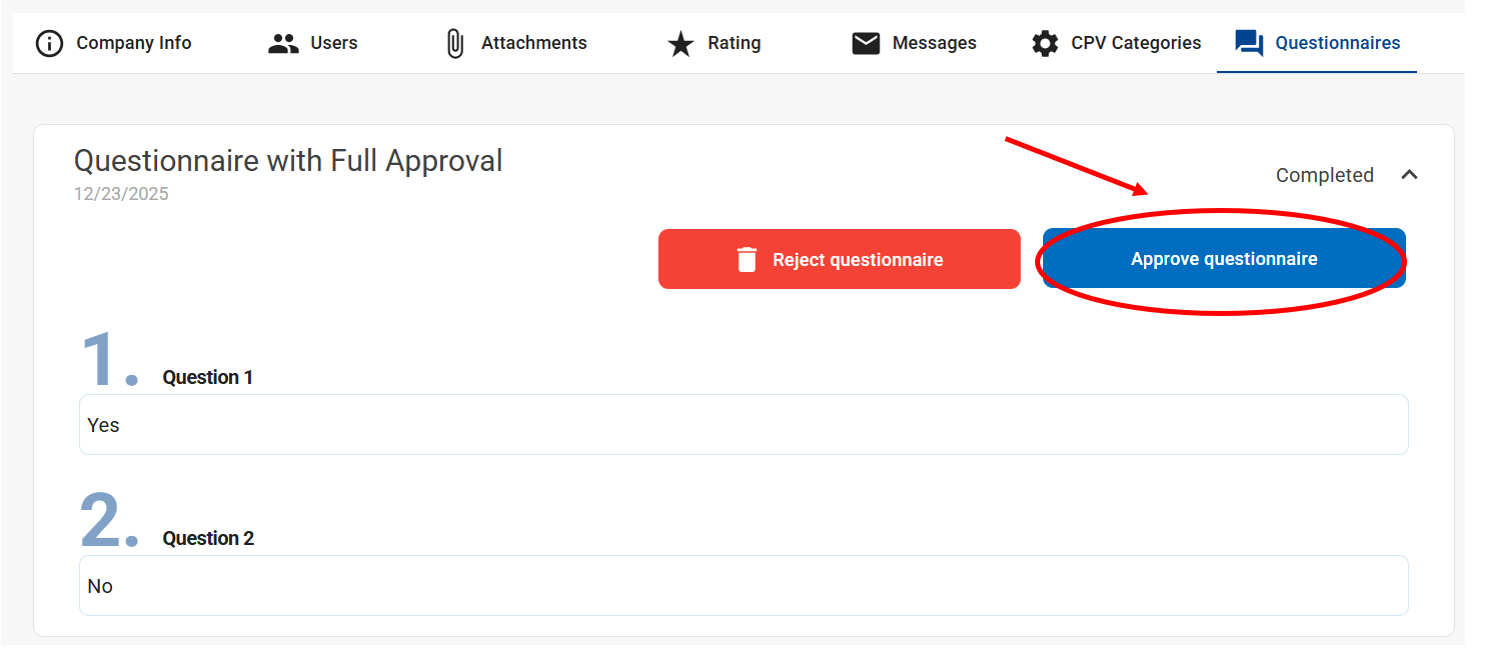
- By clicking Approve questionnaire the status changes to “Approved” and the button is disabled.
- By clicking Reject questionnaire, the status changes to “Rejected”, the button is disabled, and the questionnaire is returned to the company for resubmission.
If necessary, you can reverse the action by clicking the corresponding active button. For example, after approval, by clicking Reject the status changes to “Rejected”.
3.2 Partially approve or reject
When certain answers require approval or rejection:
- Click Approve questionnaire to start the process.
- Review the supplier’s answers and approve or reject them accordingly.
⚠️ Complete the evaluation promptly, as incompatibilities may occur if the supplier starts editing before you finish.
📺 See the related video/GIF for step-by-step guidance on how to approve or reject each question.
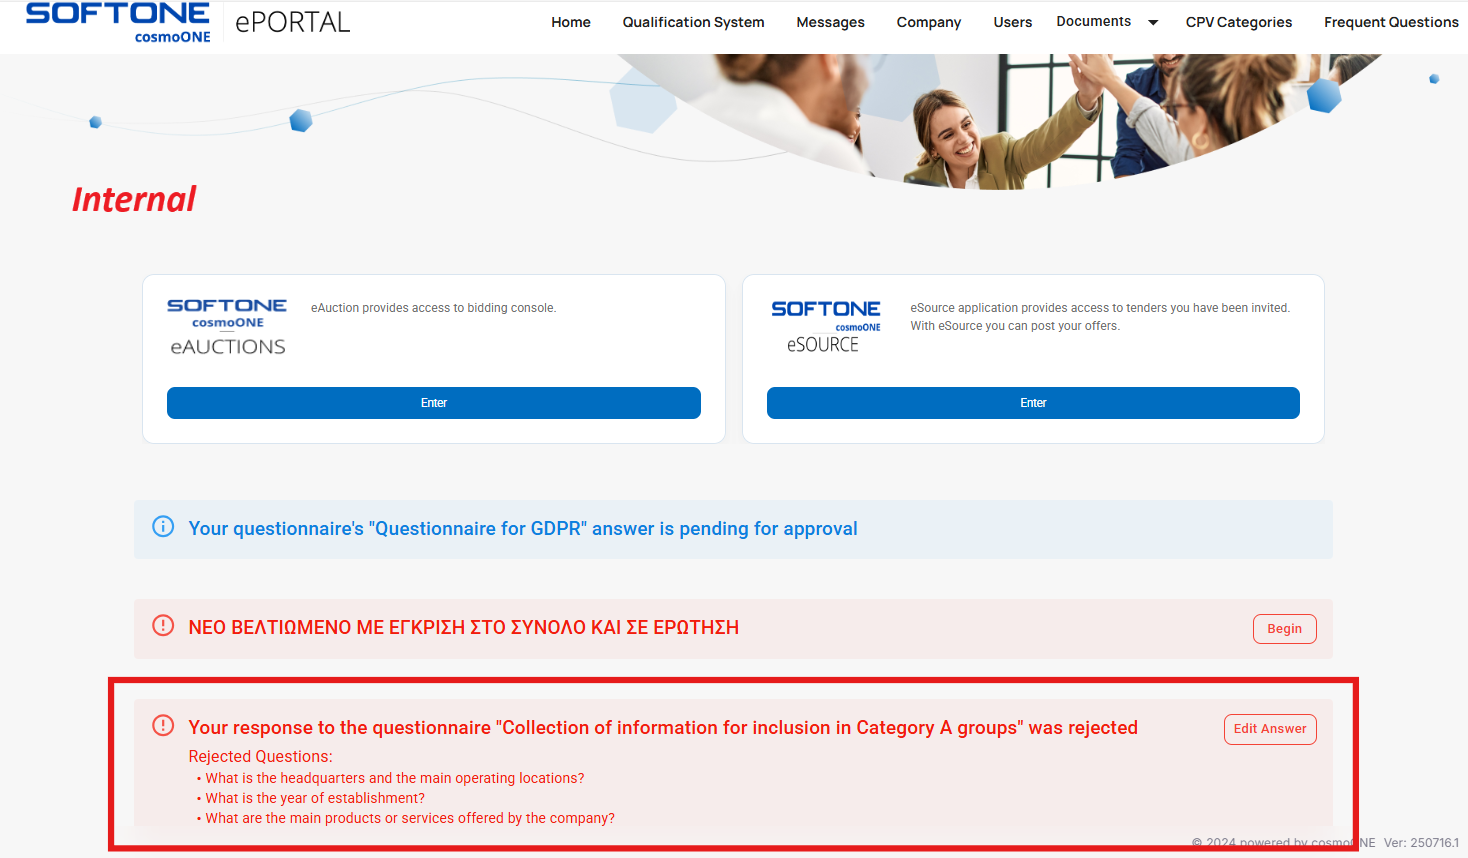
After a partial rejection, the supplier will see on their main screen a list of the rejected questions, highlighted in red, as shown in the image below.
3.3 Automatically approve a questionnaire
When the questionnaire is set for automatic approval:
- After the supplier submits a questionnaire, it is automatically approved and displayed as Approved while the Approve Questionnaire button is disabled.
- You can review the answers and, if necessary, click Reject Questionnaire to return it to the company for resubmission.
📺 See the related video/GIF for step-by-step guidance on how to reject a questionnaire that was automatically approved.